
China Sanding Sheet Essentials for Smooth Woodworking and Metal Finishing
2026-10-30
Sanding sheets often get treated as an afterthought, but the wrong grit or backing can ruin a perfect wood surface or leave deep scratches in metal. If you're chasing a finish that feels as good as it looks, the essentials matter—from grain type to backing weight, and especially where the sheet comes from. China has become a quiet powerhouse in abrasive manufacturing, and SHENZHEN SUN ABRASIVES is one of the names worth knowing. This guide walks through what to look for in sanding sheets for both woodworking and metal finishing, so your next project doesn't fight you at the final step.
Why Grit Sequence Matters More Than You Think
Most people assume that jumping straight to a very fine grit will save time, but this is exactly where the trouble begins. Every abrasive leaves behind a pattern of scratches, and the next grit in the sequence is meant to replace those scratches with smaller, more uniform ones. When you skip too many steps, the fine grit simply cannot cut deep enough to remove the coarse scratches. You end up with a surface that feels smooth in one direction but reveals deep, wandering marks under light.
The order of grits also controls how heat and pressure build up at the surface. A well-planned progression removes material in thin, consistent layers, preventing the surface from glazing over. If you linger too long on an intermediate grit or skip to a polishing compound too early, the abrasive can burnish the high spots instead of cutting them down. That shiny look may fool the eye, but it hides a weak, uneven finish that will fail once paint, stain, or clear coat is applied.
Finally, not all grit numbers are created equal across brands and materials, so the sequence you choose should be treated as a guide rather than a fixed recipe. A logical jump, such as from 80 to 120 to 180, works because each step reduces scratch depth by roughly half. Sticking to that rhythm, even when it feels slow, prevents the frustration of starting over. The real skill is not in polishing harder, but in respecting the order that lets each grit do its job.
The Overlooked Difference Between Open-Coat and Closed-Coat Sheets
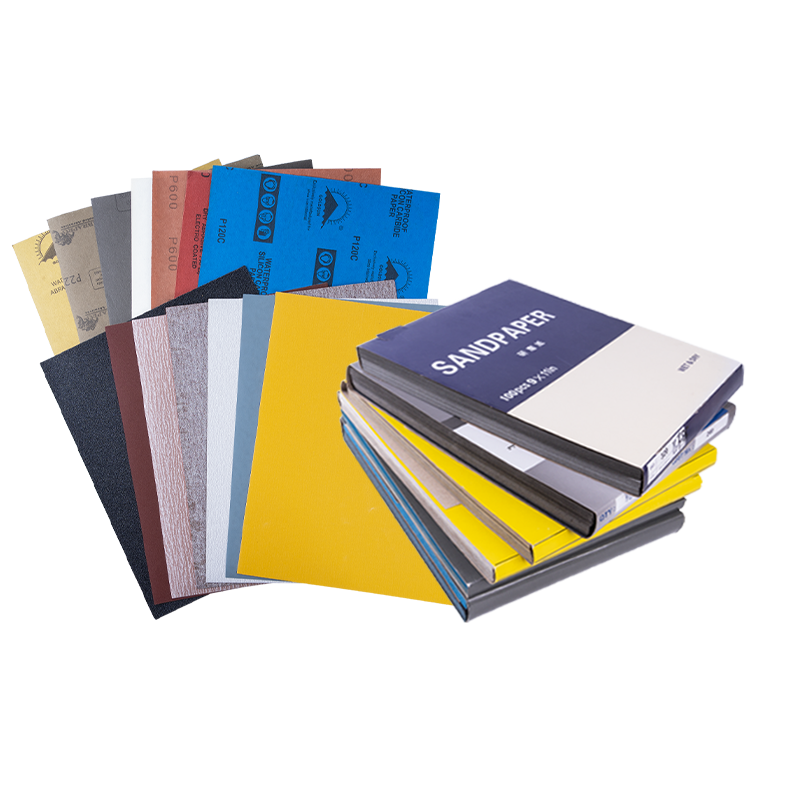
Most people who work with abrasives know that open-coat sheets have gaps between the grit particles, while closed-coat sheets pack them tightly together. But what rarely gets mentioned is how that spacing changes the way dust builds up during long sanding sessions. With open-coat paper, the spaces act like tiny escape routes for sawdust and residue, so the grit keeps cutting instead of skating over a clogged surface. Closed-coat sheets, on the other hand, load up faster—especially on softwoods or painted surfaces—because there’s nowhere for the waste to go. That’s not a flaw, just a trade-off you need to plan around.
The overlooked part isn’t the clogging itself, though. It’s the feedback you get through your hands. An open-coat sheet tends to feel rougher and slightly less stable at first, which makes some people assume it’s lower quality. But that’s actually the abrasive doing its job longer before you have to stop and clean or swap sheets. Closed-coat feels smoother and more aggressive out of the gate, yet it can go dull much faster on gummy materials. If you’re only judging by the first few strokes, you’ll miss the whole story.
So next time you’re gearing up for a project, don’t just grab whichever box is closest. Think about what you’re sanding and how long you want to keep your rhythm. For raw wood or old varnish, open-coat saves you from constant interruptions. For final passes on hard, clean surfaces where you need a consistent scratch pattern, closed-coat makes more sense. The difference isn’t obvious until you’ve spent an afternoon fighting a loaded sheet—and then it becomes impossible to ignore.
Wet Sanding Metal: When Water Becomes Your Best Friend
Water does more than cool the surface. It carries away loose grit and metal particles the moment they form, stopping them from packing into the abrasive or gouging the workpiece. Dry paper on steel or aluminum tends to glaze within seconds, then you end up pressing harder and digging irregular scratches. With a steady trickle of water, the paper keeps cutting cleanly, and the pressure you apply feels more predictable.
The trick is to treat water as a working fluid, not a splash. Keep the area flooded enough that a small puddle moves with your sanding block. Start with a grit that matches the damage — 320 for light oxidation, 220 for deeper scratches — and step up gradually. On flat panels, always use a block; fingers create soft valleys that show up after paint or powder coat. Check progress by wiping the surface dry, because water hides nothing but exaggerates gloss when it dries.
Metal reacts fast once wet sanding stops. Bare steel can flash-rust within minutes in humid air, so dry the surface completely and apply a rust preventive or primer immediately. For aluminum, use clean water and dedicated paper to avoid embedding steel particles that later create pits or dark corrosion spots under the finish.
How to Stop Sanding Sheets from Clogging Mid-Project
Sanding sheets clog when heat and friction melt resins or force dust into the abrasive. The fastest way to prevent this is to pair the sheet with the material: open-coat aluminum oxide works better on softwoods and painted surfaces because the wider grain spacing lets debris fall away instead of packing the grit. For anything with sap, oil, or finish buildup, stearated or anti-clogging sheets keep the surface cooler and shed gunk longer.
If a sheet loads up mid-project, stop and rub it against a crepe rubber cleaning stick or an old sneaker sole. A few firm swipes pull out packed dust and restore most of the cut without changing paper. For stubborn clogs, brushing with a stiff nylon brush under running water revives waterproof sheets, but let them dry fully before reuse. Slowing down your sander and letting the tool do the work also reduces melting, especially on resinous woods.
Hand Sanding vs. Machine Sanding: Where Each Actually Wins
If you've ever watched a pro restore a tabletop, you've probably seen them reach for both a random orbital sander and a simple cork block. That's not indecision—it's strategy. Hand sanding gives you a kind of control no machine can match. On curved spindles, tight corners, or delicate veneers, your fingertips read the surface in real time. You feel the grain shift, catch a subtle ridge, and adjust pressure instantly. The result is a finish that looks calm and even, not chased by a spinning disc.
Machine sanding, though, wins when the goal is sheer removal. Flattening a butcher block counter, stripping a weathered deck, or knocking down years of paint on a door—that's where a random orbital or belt sander earns its keep. It does the heavy work in minutes that would take your arm an entire afternoon. The trick is knowing when to stop. A machine will keep cutting long after the surface is fair, and that's when you end up with dips, swirl marks, or sanded-through edges.
Most experienced finishers don't pick sides. They start with the machine to level and remove, then switch to hand sanding for the final pass. That last touch with 220 or 320 grit on a block removes any remaining micro-scratches and brings the wood to a silky smoothness. If you're new to this, try a simple test: machine sand a scrap board to 180, then hand sand half of it to the same grit. Run your palm over both. You'll never again wonder where each method actually wins.
Reading the Backing: Paper, Cloth, or Film — What Holds Up?
Flip over a framed piece and the backing tells you more than the front ever will. Paper, usually a kraft or acid-free sheet, is the classic choice—cheap, easy to cut, and good enough for most posters. But it wrinkles with humidity and tears if you so much as look at it wrong. Cloth backings, like linen or cambric, add real strength and a slightly softer, more finished feel; they also let the frame breathe a little instead of trapping moisture like a plastic seal.
Film backings, often polyester or polypropylene, are the quiet workhorses in conservation framing. They're clear, so you can check for foxing or insect activity without opening everything up, and they block dust while still letting you see the back of the print. The trade-off? Film doesn't look traditional, and it can trap condensation if the frame isn't ventilated. For everyday framing, paper is still fine, but if you're storing or moving art often, cloth or film will hold up far better.
FAQ
Start with 80 grit to remove mill marks and level joints, then jump to 120 for scratch refinement, and finish around 180 or 220 before sealing. On softer woods, stop at 180 to avoid burnishing that blocks stain absorption. Chinese alumina zirconia sheets hold up well through the coarse stages, while silicon carbide paper gives a crisper final scratch pattern.
Many Chinese factories now use electrostatic coating to distribute abrasive grains evenly, so cut rate and lifespan are close to European brands at half the cost. For body filler shaping, pick a stearate-coated sheet to resist clogging; for bare metal, skip the coating and use a wet/dry silicon carbide sheet with a little water to prevent rust blooms.
For flat panels and orbital sanders, a C-weight or D-weight paper backing resists tearing when wrapped around a block. For curves and profiles, switch to a flexible J-weight cloth or a thin latex-impregnated paper that conforms without cracking at the folds.
Use an open-coat sheet with wider gaps between abrasive grains—that gives swarf a place to go instead of sticking. A quick pass with a rubber cleaning stick every few minutes revives the cut. For really sappy pine, try a waterproof sheet with a few drops of dish soap in water; it suspends resin and rinses clean.
Yes, if you sort them by task. Buy 50-sheet packs in 80, 120, and 220 grit, and store them flat in a dry cabinet to prevent edge curl. The cost per sheet drops enough that you can toss a loaded sheet early instead of pressing harder and burning the wood.
Not ideally. Wood dust is acidic and clogs the gaps, while metal particles tear the paper fibers differently. If you must cross over, use a closed-coat zirconia sheet for rough metal first, then keep retired sheets for knocking down wood filler—never the reverse, or leftover metal grit will rust-stain oak and maple.
P-grade follows the European FEPA standard and allows tighter particle size ranges, so a P220 cuts closer to a true 220 scratch. CAMI grades from older US specs run slightly coarser for the same number—a CAMI 220 acts more like a P180. Check the backing stamp; many Chinese export sheets print both, but trust the P number for final finishing.
Conclusion
Getting a flawless finish on wood or metal starts long before the final pass—it hinges on respecting the grit sequence. Skipping from coarse to fine too quickly leaves deep scratches that only show up after staining or polishing. A steady progression, say 80 to 120 to 180 to 240, creates a uniform surface that allows each subsequent grit to do its job without fighting the previous one. Meanwhile, the choice between open-coat and closed-coat sheets often gets ignored. Open-coat has wider spacing between abrasive grains, which prevents softwoods, resinous lumber, or aluminum from packing the surface with debris. Closed-coat delivers more cutting power per square inch and works well on hard metals or dense hardwood where clogging is less of a threat.
When metal finishing demands a mirror-like shine, wet sanding becomes an ally. Water flushes away swarf, cools the workpiece, and keeps abrasive edges sharper longer. To avoid mid-project frustration, clean or replace sheets before they glaze over—a stiff brush or rubber cleaning stick can revive an open-coat sheet quickly. Hand sanding gives you control on curves, edges, and delicate profiles, while machine sanding wins on large flat panels and repetitive stock removal. Pay attention to the backing too: paper is fine for dry hand work, cloth flexes without tearing on contoured metal, and film offers consistent thickness for ultra-smooth finishes. Matching the backing and coat type to the task, and sticking to a logical grit ladder, separates a rushed job from a result that feels professionally done.
Contact Us
Contact Person: Amanda Wang
Email: [email protected]
Tel/WhatsApp: +86-13602569854
Website: https://www.sunabrasives.com.cn